Setting up an Open Source GIS stack
I was very fortunate to have access to the ESRI GIS stack including ArcGIS Info, ArcSDE and ARC/INFO during my time at SKM. However these costs are very hard to justify in a lean startup environment, especially when GIS is not the main purpose of the startup. This is where open source software comes in.
In this article, I will go through how to set up a comparable GIS environment using open source software. Specifically:
- Setting up a spatial database with PostgreSQL/PostGIS
- Importing OpenStreetMap data
- Setting up desktop GIS with QGIS
We'll be using PostgreSQL 9.4, PostGIS 2.2 and QGIS 2.12 in this article, although the setup is largely the same for different versions. This tutorial is written for Windows since most ArcGIS users will be living in that environment. I'll also assume you have a admin account to work with as we will be installing software. There will be a Linux based article coming up when we get into webmapping.
Installing PostgreSQL/PostGIS
We will need PostgreSQL on our system first. The installation executables are hosted on Enterprise DB - find the version 9.4.x section and download/install the x32 or x64 version depending on what PC you have.
The setup lets you choose the data directory and the connection port - the default is sufficient for this article, but these can be changed later in the config files. It also asks for the database superuser (postgres) password - this is important so choose something memorable.
After the set up has finished, it'll give the option to install PostgreSQL extensions. We'll be installing the PostGIS extension manually in a moment, so skip this step.
PostGIS binaries are hosted by OSGeo.org. Select the Postgres version you have installed previously ("pg94" if following along with this article) then download and install the x32 or x64 version. Note that if you installed x32 PostgreSQL, you must use x32 PostGIS. Similarly, a x64 PostgreSQL will only work with x64 PostGIS.
In the PostGIS install wizard, ensure that PostGIS is checked and that 'Create spatial database' is unchecked - I'll go through how to manually create a spatial database below. It'll also ask if you want to enable raster extensions - these can be disabled for now.
Since this is for 'local' development, the default config is sufficient.
As a side note, PostGIS is actually much more than just a database. It can do spatial analysis and processing for both vectors and rasters, akin to ARC/INFO.
Setting up PostGIS
Verifying your installation worked
If you used the installer from Enterprise DB, it includes pgAdmin, a handy admin tool. Start it up then go to File > Add Server to bring up the server connection window.
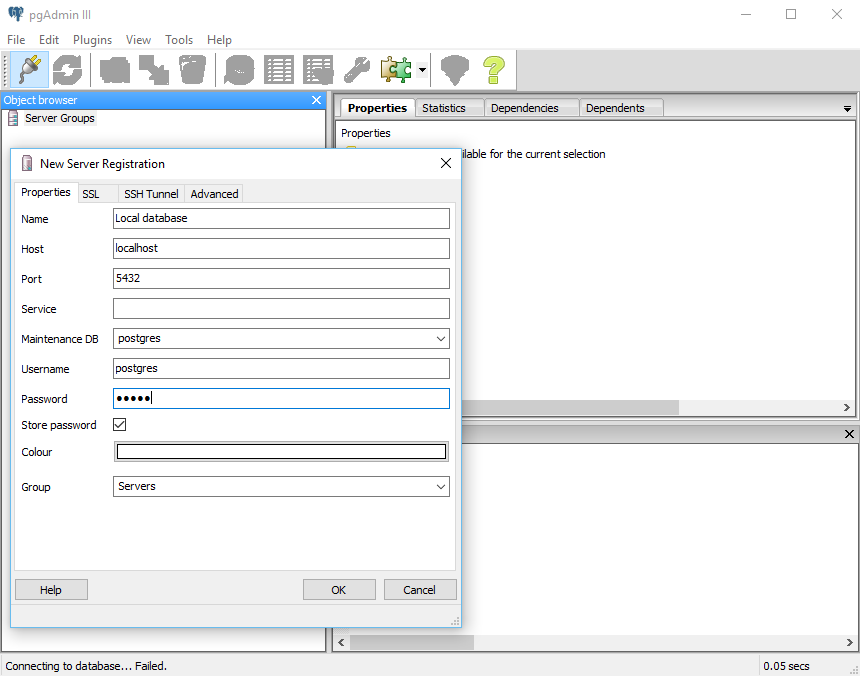
To connect to your local server, enter the following:
Name: Local PostgreSQL
Host: localhost
Port: 5432
Username: postgres
Password: the password you chose when installing PostgreSQL
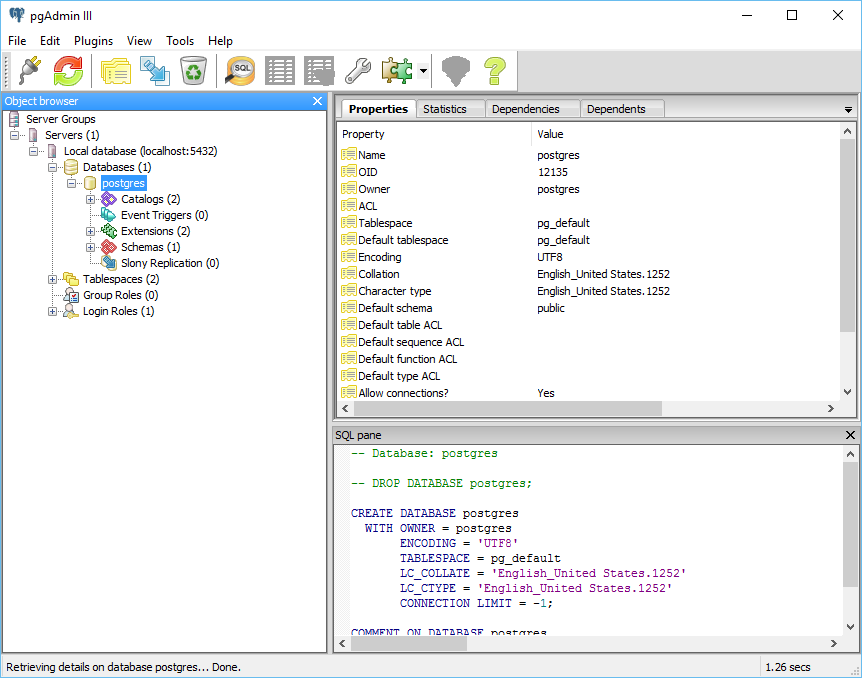
If it worked, your database connection will appear in the object browser window as shown below:
Alternatively, you can connect via command line. I prefer using Git bash for this but the Windows command prompt will also work. This command will connect to your database with a user called 'postgres'.
psql -U postgres
While we are logged in as the admin user, we can create the GIS user, creatively called 'user_gis', and a spatial database. If you want to use pgAdmin, you can open up the console from Plugins > Console.
First, lets create a user:
postgres=# CREATE USER user_gis PASSWORD 'gis_password';
Then we can create a database with the GIS user as the owner.
postgres=# CREATE DATABASE gis_db WITH OWNER user_gis ENCODING 'utf8';
The next stage is to spatially enable it. To do so, we must first connect to the new database and apply the PostGIS extension. Disconnect from our current session using \q then connect to the new database using:
psql -U postgres -d gis_db;
By default, psql will try to connect to a database with the same name as the username ('postgres' in this case), so we need to specify the database we want using the -d gis_db parameter.
We are also not connecting with user_gis as only superusers have permission to create extensions.
gis_db=# CREATE EXTENSION postgis;
To check if it worked, type \d+ in the console. This is approximately similar to MySQL's DESCRIBE command. It should show the following views created by PostGIS: geography_columns, geometry_columns, raster_columns and raster_overviews, as well as the table spatial_ref_sys.
Now that the spatial database is setup, we can disconnect from it and use the user_gis for the remainder of this guide.
PostgreSQL Schemas
First, a little housekeeping before we get carried away and clutter up our database. PostgreSQL has a concept of schemas, which are like a workspace or directory in an operating system. They're a great way for organising data without creating multiple databases.
Let's connect to our database and make a schema for the OpenStreetMap data, creatively called osm_data.
psql -U user_gis -d gis_db;
gis_db=# CREATE SCHEMA osm_data;
If you type \dn it'll list all the schemas. There should be two here: osm_data owned by user_gis and the default public schema owned by the postgres user.
Schema's let us organise data by providing logical partitions so that a table can be referenced as schema_name.table_name. However, typing out the schema qualification could get pretty tiring. To shortcut this, we have to update the search_path, which specifies the order schemas are searched when an object is referenced with the schema-less name.
This is functionally similar to the Windows Path variable. Of course, you may still need to set the schema qualification when you have two tables with the same name to ensure you have the right one, or if you need to reference one lower down the list. We'll also have to specify the schema when creating tables otherwise it will go to the first one.
If we type SHOW search_path; it'll show our existing search_path (no surprise). The defaults are "$user", public.
"$user" in the search_path means it will look for a schema named after the user who is connected. In this case a schema named user_gis, which does not exist. public does exist, and is the default shared database for all users.
We'll now set the search_path to include the one we just created.
gis_db=# ALTER DATABASE gis_db SET search_path TO osm_data, "$user", public;
Running SHOW search_path; will show our old search_path. We'll need to disconnect and reconnect to see the changes.
Ok, finally we are ready to import some GIS data.
Downloading OpenStreetMap data
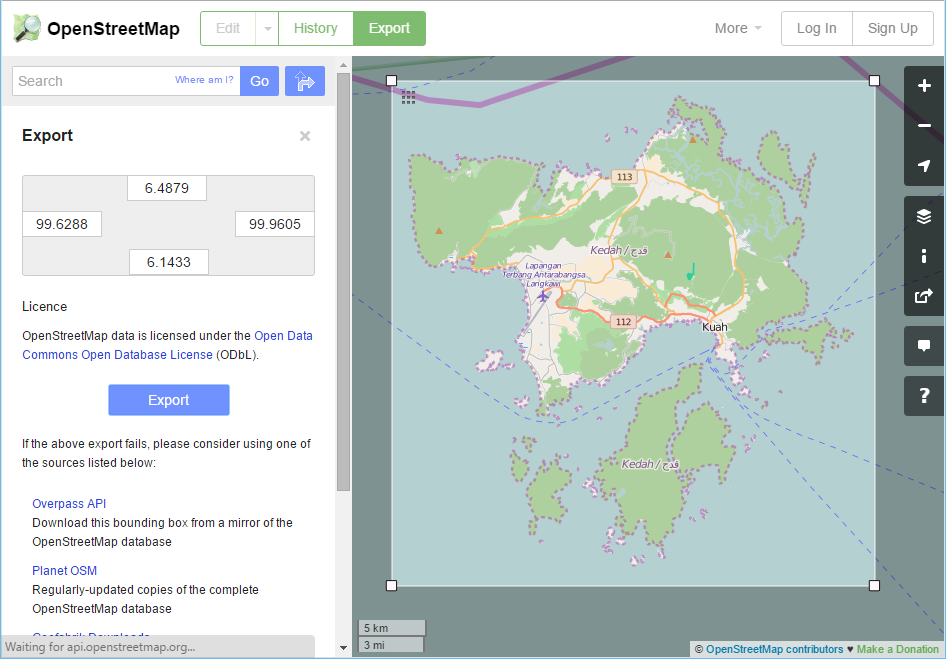
For the sake of this article, we'll download a small area using the export option in OpenStreetMap.
Go to OpenStreetMap and pan/zoom the map to an area you are interested in. Go to the export tab and optionally click the 'Manually select a different area' link underneath the export bounds.
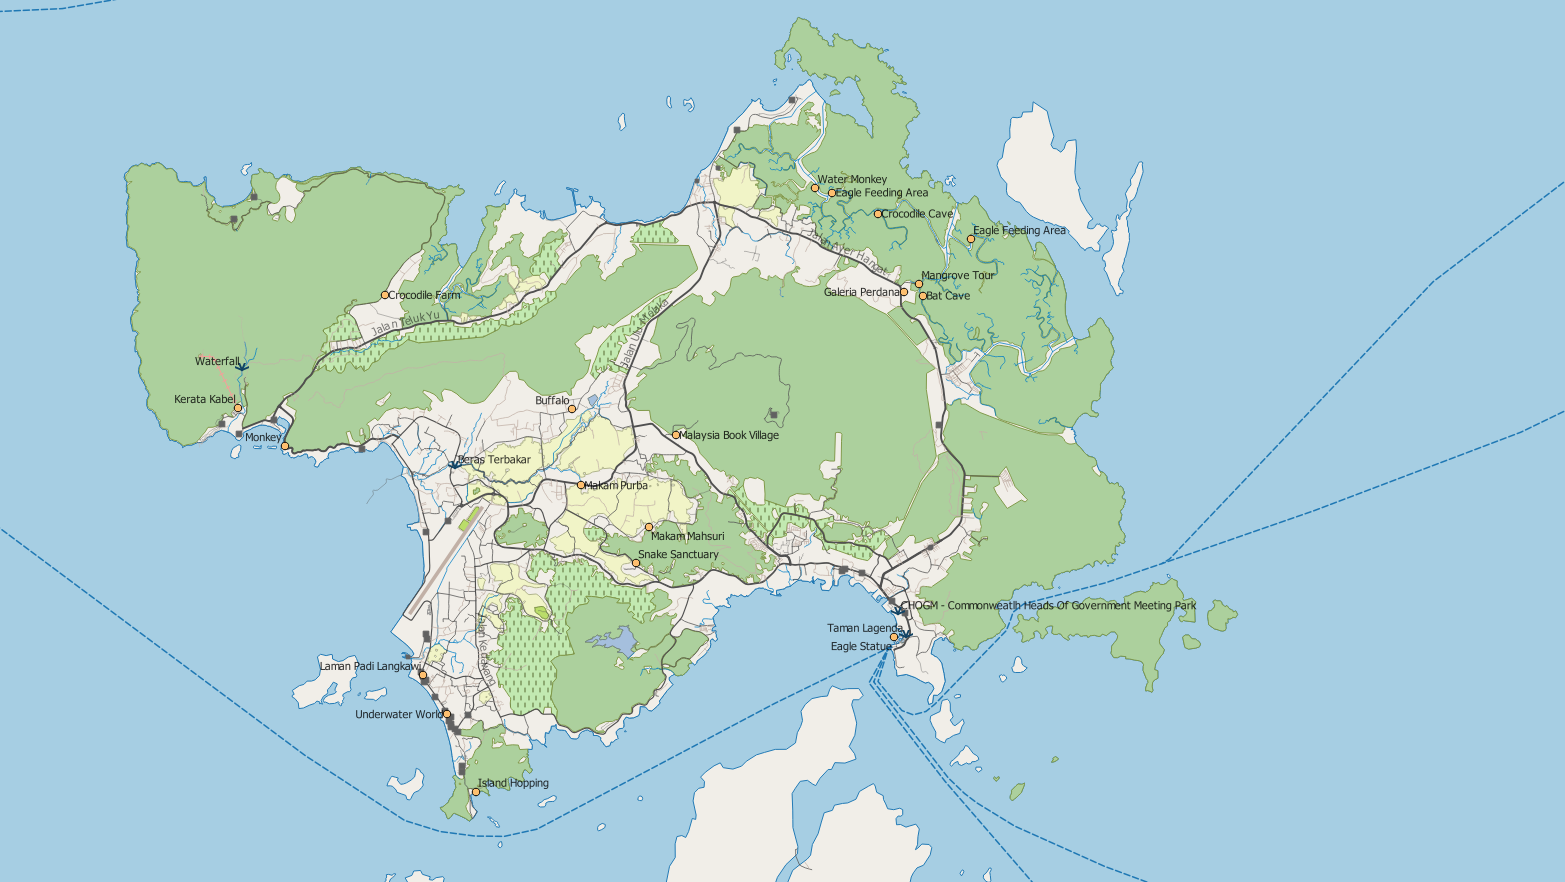
In my case, I have selected the island of Langkawi, Malaysia and set up the bounding box to include the neighbouring islands.
There are better ways for downloading larger areas (eg. using the Overpass API) but as this is an article focussed on just setting up the GIS, that may be the topic for a future post.
Importing OpenStreetMap data
This is an area where Windows users are at a definite disadvantage. Most open source import tools were written with Linux in mind and require the user to build from source, or only provide precompiled Linux packages.
We'll be using Osm2pgsql as there is a convenient, compiled Windows version available.
After you have downloaded and unzipped the cygwin-package, open up a command prompt in that folder.
We'll import our data using the following:
osm2pgsql --database gis_db --host localhost --port 5432 --username user_gis --password --slim --style default.style --keep-coastlines path/to/map.osm
The parameters are mostly self explanatory: slim mode is enabled to reduce RAM usage and is the recommended way of loading data; we'll be using the default style to map the OSM data columns to our database, and we will be keeping the coastlines as it is removed by default. You can type osm2pgsql -h -v to show the list of available parameters.
Installing QGIS
Quantum GIS (QGIS) is a great tool for visualising spatial data and arguably one of the more popular open source GIS packages. You can download the latest version, with support for all major operating systems. Follow the setup instructions to install it.
The QGIS UI and functions should be familiar to ArcGIS desktop users, and it is also extendable via plugins. In any case, the best way of learning it is to play around and to go through the manual.
Connecting to PostGIS with QGIS
Start up QGIS Desktop and look for the Manage Layers Toolbar. Click the Elephant icon to add a PostGIS table.
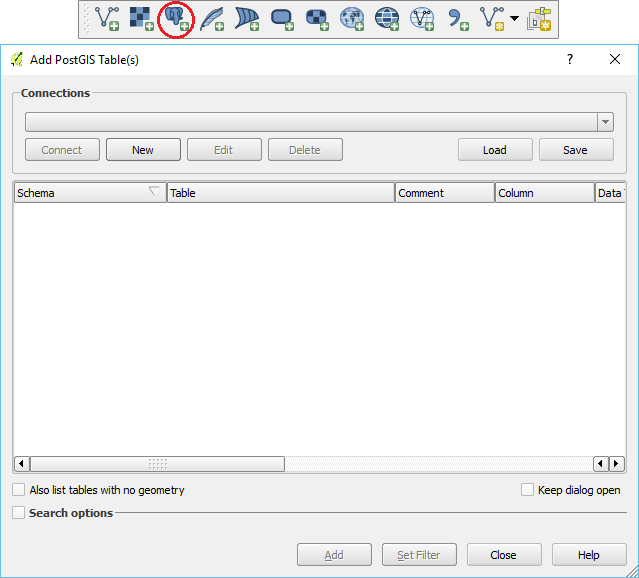
In the Add PostGIS Table dialog, click the New button in the Connections section.
Use the following details to set up the connection to our local database:
Name: localhost - OSM (You can call this whatever you want)
Host: localhost
Port: 5432
Database: gis_db
Username: user_gis
Password: gis_password (Or use whatever password you set up previously)
The Username and Password saving is optional - it'll tell you the password will be saved a plain text file so you may want to uncheck that if that is a concern.
Click the Test Connection button to confirm the connection works. If successful, click the OK button to finish the dialog. If there was an error, double check the connection settings and try retyping the password.
Back in the Add PostGIS Table dialog, choose the connection we just created in the Connections section and click Connect. The table underneath will be populated with tables found using the search_path defined earlier. Note that not just spatial data is visible - we can also add regular PostgreSQL tables using this method.
Expand the osm_data schema and select all the tables shown there - they should be called planet_osm_line, planet_osm_point, planet_osm_polygon and planet_osm_roads. Click the Add button to finalise your selection and add the datasets to QGIS.
The Layers Panel now shows the four layers. With a bit of GIS manipulation, you can render your map like OpenStreetMap or anyway you like.

And there you have it - your very own Open Source GIS stack.
Published Feb. 28, 2016, 11:57 p.m.
blog comments powered by Disqus